The Best Way to Clean Your Stainless Steel Sink (Natural Cleaning Hack That Works!)
If you’ve been staring at your dull, water-spotted stainless steel sink wondering how it lost its shine, you’re not alone. Stainless steel sinks are beautiful when new, but they can quickly become covered in water spots, stains, and that frustrating cloudy film that makes them look old and neglected. The good news? You don’t need expensive chemical cleaners to restore that brilliant shine. In fact, the best way to clean a stainless steel sink uses three simple ingredients you already have in your kitchen.
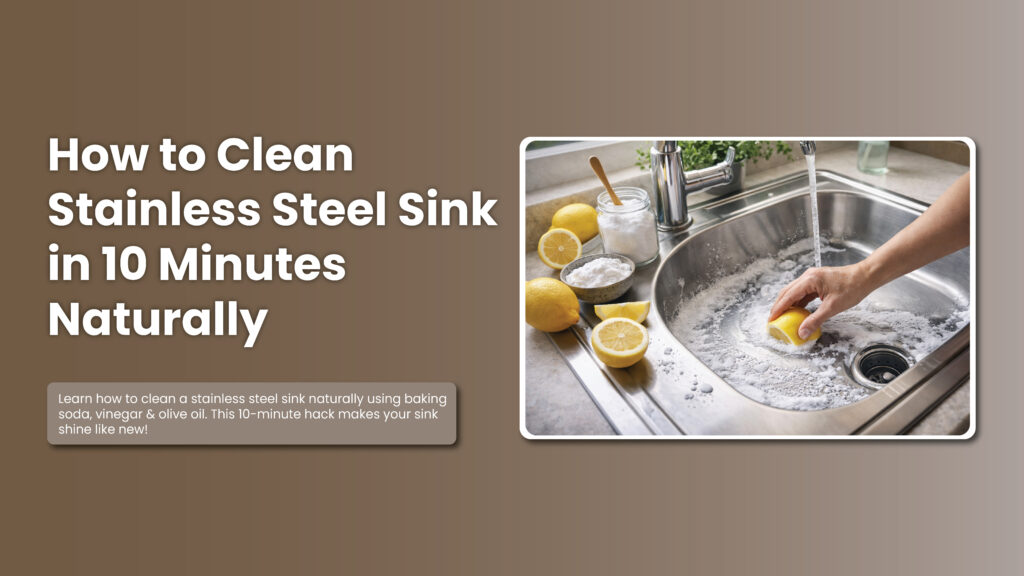
This natural cleaning hack takes just 10 minutes and will transform your sink from dull to dazzling. Let me show you exactly how to clean a stainless steel sink the right way, using a method that actually works.
Why Your Stainless Steel Sink Loses Its Shine
Before we dive into the cleaning process, it’s helpful to understand why stainless steel sinks get so dull in the first place. Despite the name, stainless steel isn’t completely stain-proof. Hard water deposits, soap scum, food particles, and minerals from tap water all build up on the surface over time. These create that cloudy appearance and water spots that make your sink look dirty even when it’s technically clean.
Many people reach for harsh chemical cleaners like Comet or Ajax, but these abrasive products can actually scratch the surface of your sink over time, making it more susceptible to staining and dulling. The natural method I’m about to share is gentler on your sink while being tough on grime and buildup.
How Do You Clean a Stainless Steel Sink? The Three Ingredient Method
The secret to getting your stainless steel sink sparkling clean lies in three pantry staples: baking soda, white vinegar, and olive oil. Each ingredient plays a specific role in the cleaning process. Baking soda acts as a gentle abrasive that scrubs away stuck-on food and stains without scratching. White vinegar disinfects and dissolves mineral deposits. And olive oil is the game-changer that creates that gorgeous, water-repelling shine.
- Here’s everything you’ll need:
- Baking soda
- White vinegar
- Olive oil
- A soft sponge or cloth
- Paper towels
- Clean dish towels
That’s it. No special equipment, no expensive cleaners, just simple household items that are safer for your family and the environment.
Step by Step: How to Clean Stainless Steel Sink Naturally
Step 1: Clear and Rinse Your Sink
Start by removing any dishes, food debris, or items from your sink. Give it a quick rinse with warm water to remove loose particles. You want to start with a wet sink because this helps the baking soda spread more evenly and prevents scratching.
Make sure to remove anything stuck to the bottom or sides of the sink. This initial rinse is important because you don’t want to scrub food particles around, which could potentially scratch the surface.
Step 2: Apply Baking Soda Generously
This is where the cleaning magic begins. Sprinkle baking soda liberally all over your sink. Don’t be shy with it. Cover the entire surface, including the sides, bottom, and even around the drain and faucet base. You want a generous coating that looks almost like a light dusting of snow.
Baking soda is mildly abrasive, which makes it perfect for cleaning stainless steel. It’s tough enough to scrub away grime but gentle enough that it won’t scratch the surface when used properly.
Step 3: Scrub in the Direction of the Grain
Here’s a crucial tip that many people miss: stainless steel has a grain, just like wood. Look closely at your sink and you’ll notice thin lines running in one direction. Always scrub in the direction of these lines, never against them or in circles.
Take your damp sponge and start scrubbing the baking soda into the surface of the sink, following the grain. Use gentle circular motions if needed on stubborn spots, but always finish with strokes that go with the grain. This prevents scratching and helps achieve that smooth, polished look.
Pay special attention to areas around the drain, the corners where the sink meets the counter, and any spots where you see staining or buildup. The baking soda paste that forms as you scrub is doing the hard work of lifting away stuck-on gunk and brightening the stainless steel.
Step 4: The Vinegar Reaction
Once you’ve scrubbed the entire sink with baking soda, it’s time for the vinegar. Pour white vinegar over the baking soda-covered sink. You can pour it directly from the bottle or use a spray bottle for more even coverage.
Watch as the vinegar and baking soda react, creating a fizzing, bubbling action. This isn’t just for show. This chemical reaction helps loosen deep-set grime and mineral deposits that plain scrubbing might miss. The vinegar also disinfects and deodorizes while breaking down hard water stains.
Let the fizzing action work for about a minute. You’ll notice the bubbles lifting away the baking soda along with the dirt and grime it captured.
Step 5: Rinse and Dry Completely
Rinse away all the baking soda and vinegar with warm water. Make sure you rinse thoroughly, getting into all the corners and around the faucet. Any residue left behind can leave spots once it dries.
Here’s another critical step that many people skip: dry your sink completely with a clean dish towel. Don’t let it air dry. Air drying is what causes those annoying water spots. Take a clean, dry towel and wipe down every surface until the sink is completely dry.
At this point, your sink should already look noticeably cleaner and brighter. But we’re not done yet. The next step is what truly transforms your sink from clean to spectacular.
Make Stainless Steel Sink Shine: The Olive Oil Secret
This is the stainless steel sink cleaning hack that changes everything. Put a few drops of olive oil on a clean paper towel. You don’t need much, just a small amount will do. Too much oil will leave your sink looking greasy rather than shiny.
Buff the olive oil into the surface of your dry sink, again working in the direction of the grain. Use circular motions to work the oil in, then finish with long strokes following the grain. The oil fills in tiny imperfections in the steel and creates a protective layer that repels water.
As you buff, you’ll see your sink transform before your eyes. The olive oil brings out a deep, lustrous shine that looks almost like your sink is brand new. It also creates a barrier that helps prevent water spots and fingerprints from showing up as easily.
Wipe away any excess oil with a clean, dry paper towel. You want a thin, even coat that’s been buffed to a shine, not visible oil sitting on the surface.
How to Remove Scratches from Stainless Steel Sink
While this cleaning method won’t remove deep gouges, it can significantly minimize the appearance of light scratches. The olive oil fills in minor scratches and helps them blend with the surrounding surface. For slightly deeper scratches, you can use this technique:
After completing the basic cleaning, apply a small amount of olive oil directly to the scratch. Using a soft cloth, rub the oil into the scratch in the direction of the grain. Use firm, consistent pressure and buff for several minutes. The oil helps blend the scratch with the grain pattern of the steel.
For more stubborn scratches, you might need a specialized stainless steel scratch removal product, but you’d be surprised how many minor imperfections disappear with regular cleaning and oiling.
Best Way to Clean Stainless Steel Sink: Tips for Maintaining the Shine
Now that you know how to clean a stainless steel sink naturally and get that incredible shine, here are some tips to help maintain it:
Rinse your sink after each use. This simple habit prevents food and minerals from building up. Dry your sink after washing dishes. This is the single most effective way to prevent water spots. Keep a towel near your sink specifically for this purpose. Repeat the olive oil treatment weekly. It only takes a minute and keeps your sink looking showroom-new. Avoid leaving wet sponges, steel wool, or cast iron pans sitting in your sink. These can cause rust spots on stainless steel. For daily cleaning between deep cleans, a simple wipe with dish soap and water followed by drying is sufficient.
Clean Stainless Steel Sink Naturally: Why This Method Works Better Than Chemicals
Chemical cleaners might promise quick results, but they come with downsides. Many contain harsh abrasives that create microscopic scratches over time, actually making your sink more prone to staining. They can also leave chemical residues where you prepare food and wash dishes.
This natural method works with the properties of stainless steel rather than against them. Baking soda provides gentle abrasion without damage. Vinegar’s acidity dissolves minerals naturally. And olive oil protects and shines without toxic fumes or residues. Plus, these ingredients are safe if they come into contact with your food prep areas, won’t irritate your skin, and don’t release harsh fumes into your kitchen.
The Results Speak for Themselves
This stainless steel sink cleaning hack takes just 10 minutes from start to finish, costs pennies in ingredients, and delivers results that rival or exceed expensive specialty cleaners. Your sink will look brighter, shinier, and newer than it has in years.
The best part? This isn’t a one-time miracle. This method is sustainable for regular use. You can repeat it weekly, monthly, or whenever your sink needs refreshing, without worrying about damaging the finish or exposing your family to harsh chemicals.
So the next time someone asks you how do you clean a stainless steel sink, you’ll have the answer: naturally, effectively, and with ingredients you already own. Try this method today and prepare to fall in love with your kitchen sink all over again. That sparkling, mirror-like shine is just 10 minutes away.

